Call of Duty: Warzone Season 1 (MW4) Best Perks Guide: Meta Loadouts and Elite Perks Explained
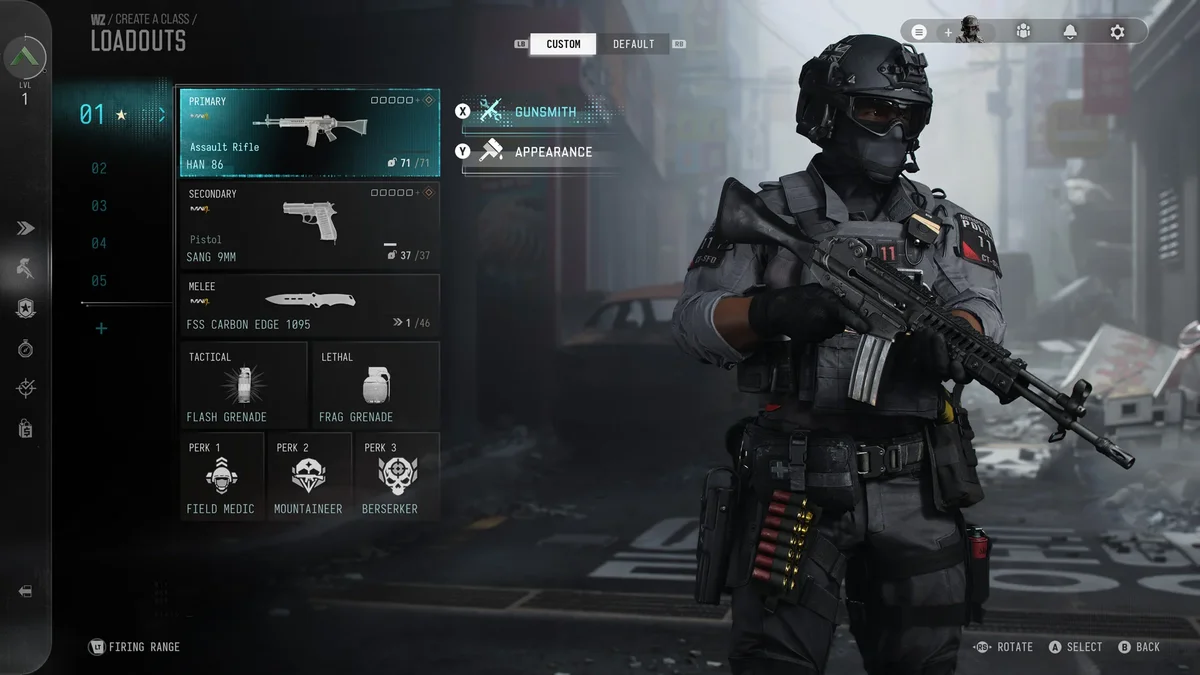
With the full integration of Call of Duty: Modern Warfare 4 into Call of Duty: Warzone for the launch of Season 1 across PlayStation 5, Xbox Series X|S, PC, and Nintendo Switch 2, developers Raven Software and Infinity Ward have completely overhauled how custom classes work. Following community feedback from the beta, default Tactical Sprint across Hajin and Zodiac is now built into every Operator's base movement kit without eating up a Perk slot.
Freed from mandatory movement Perks, the Season 1 Perk system revolves around 18 total passive abilities: 15 standard Loadout Perks split evenly across three pre-match categories (blue cases for Perk 1, red cases for Perk 2, and yellow cases for Perk 3), alongside 3 brand-new Elite Perks (purple cases) that unlock a dynamic fourth slot during live matches. Here is our complete breakdown of the best meta Perks and top loadout combinations for Battle Royale and Resurgence.

Best Perks for Every Slot (Slots 1, 2, and 3) in Warzone Season 1
Before dropping into the borderlands of Hajin or the tight industrial corridors of Zodiac, locking in the right three custom Loadout Perks dictates how fast you can reset between gunfights and how much intel your squad gathers:
- Perk 1 Category (Blue Slot, Survival, Tracking, and Supply): Two options stand head and shoulders above the rest depending on your playlist. For Solo players and aggressive fraggers, Hunter is the undisputed top pick: it reveals enemy footprints, senses nearby opponents, triggers a warning alert whenever an enemy aims down sights at you, and temporarily outlines enemies you hit with gunfire. In Trios and Quads, Field Medic is mandatory for squad survival, allowing you to revive downed teammates significantly faster directly to 100% health (while granting you the exact same benefit when revived) and increasing your health pool while downed. Meanwhile, Stocked serves as a fantastic utility pick that immediately maxes out your primary and secondary ammo reserves upon grabbing a Loadout Drop while letting you carry an extra Lethal and Tactical piece.
- Perk 2 Category (Red Slot, Handling, Plating, and Mobility): Deft Hands claims the number-one spot in Slot 2 without contest. In fast-paced engagements where every millisecond matters, it speeds up armor plate insertion, equipment usage, and supply crate looting, while granting an immediate burst of movement speed every time you insert a plate. As aggressive alternatives, Adaptive boosts your sprint-to-fire speed while fully plated and increases your movement speed whenever your plates are cracked, whereas Mountaineer cuts fall damage, removes landing stun, speeds up climbing, and unlocks a combat roll to cushion high drops.
- Perk 3 Category (Yellow Slot, Armor Economy and Turnarounds): Tempered remains the gold standard in Warzone. By allowing your Operator to reach full armor capacity using only 2 reinforced plates instead of 3, it cuts your plating downtime by 33% and preserves your plate economy for late-game circles. If you prefer relentless multi-kill chains in Resurgence, Quick Fix immediately triggers health regeneration upon scoring a kill or inserting an armor plate, while Berserker grants a temporary boost to ADS, weapon swap, and reload speeds after every elimination.
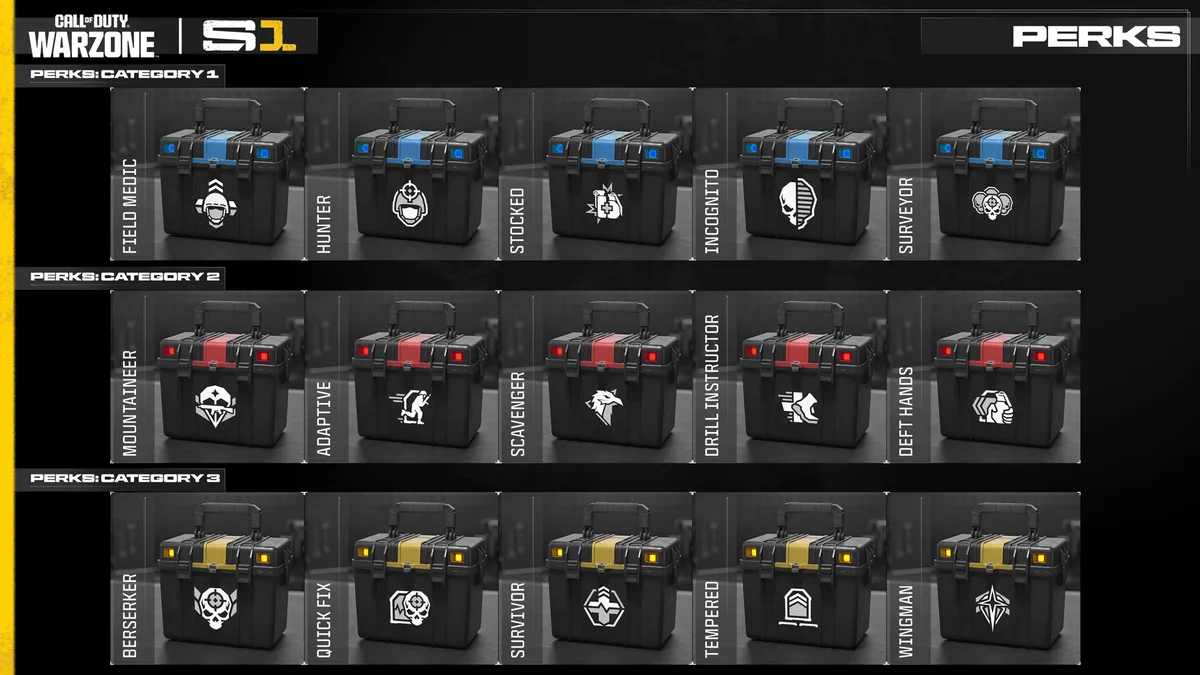
Complete Warzone Season 1 Perks Tier List and Effects Table (Slots 1 to 3)
To help you fine-tune your custom classes at a glance, here is the full breakdown of all 15 standard Perks available at launch in Season 1 alongside their current meta tier rating:
| Slot Category | Perk Name | Meta Tier | Exact In-Game Effect in Warzone Season 1 (MW4) |
|---|---|---|---|
| Perk 1 (Blue) | Hunter | S-Tier (Solo / Aggro Meta) | Tracks enemy footprints, senses nearby opponents, alerts you when aimed at, and outlines enemies you shoot for a brief duration. |
| Perk 1 (Blue) | Field Medic | S-Tier (Squad Meta) | Quickly revives allies directly to full health (granting you the same benefit when revived) and increases your health while downed. |
| Perk 1 (Blue) | Stocked | A-Tier | Holds an extra Lethal and Tactical item with visible throw trajectory, boosts explosive/launcher damage, and grants full primary/secondary ammo reserves from a Loadout. |
| Perk 1 (Blue) | Incognito | A-Tier (Counter-Meta) | Reduces radar reveal duration and Hunter outline duration, restricts enemies to danger-pings only, and delays triggered traps. |
| Perk 1 (Blue) | Surveyor | B-Tier | Briefly snapshots the nearby enemy squad on a kill, highlights enemies in Last Stand, and reveals enemies on radar when they activate a Buy Station or Contract. |
| Perk 2 (Red) | Deft Hands | S-Tier (Overall Meta) | Inserts armor plates, uses equipment, and opens supply crates faster while granting a burst of movement speed upon plate insertion. |
| Perk 2 (Red) | Adaptive | A-Tier | Improves sprint-to-fire speed when fully plated and increases movement speed when missing armor plates. |
| Perk 2 (Red) | Mountaineer | A-Tier | Reduces fall damage while avoiding landing stun, improves climb speeds, and enables a combat roll to further mitigate fall damage. |
| Perk 2 (Red) | Scavenger | B-Tier | Eliminated enemies drop a supply pack providing ammo, equipment, armor plates, and cash for your squad. |
| Perk 2 (Red) | Drill Instructor | B-Tier | Boosts your squad's sprint speed (does not stack) and triggers health regeneration during sustained sprinting. |
| Perk 3 (Yellow) | Tempered | S-Tier (Overall Meta) | Refills your armor bar to maximum capacity using only 2 plates instead of 3, cutting downtime and saving plate reserves. |
| Perk 3 (Yellow) | Quick Fix | S-Tier (Resurgence) | Immediately starts health regeneration whenever you get an elimination or insert an armor plate. |
| Perk 3 (Yellow) | Berserker | A-Tier | Briefly improves ADS speed, weapon swap speed, and reload speed after scoring a kill. |
| Perk 3 (Yellow) | Survivor | A-Tier | Speeds up health regeneration startup, resists Flash, Concussion, and Shock effects, reduces non-Killstreak explosive damage, and grants knockdown immunity. |
| Perk 3 (Yellow) | Wingman | B-Tier | Reduces ally buy-back costs at Buy Stations and removes the enemy-visible flare when teammates redeploy. |
Best Perk Loadout Combinations for Every Playstyle
To get the most out of our best meta M4 and ISO Nightshade loadouts across Season 1's new Battle Royale and Resurgence maps, pair your weapons with one of these three proven Perk setups:
- The All-Purpose Aggressor (Hunter + Deft Hands + Tempered): This is the highest-performing all-around setup for both Battle Royale and Resurgence. Hunter highlights targets through visual clutter as soon as your first bullet lands and warns you when snipers hard-scope your lane, while Deft Hands and Tempered let you slam two fast plates for full armor while triggering a speed boost to break enemy cameras around corners.
- The Ultimate Squad Anchor in Trios & Quads (Field Medic + Deft Hands + Quick Fix or Wingman): Built for team players who keep their squad alive during chaotic late-game rotations on Hajin. Field Medic brings downed teammates back at 100% health in record time, Deft Hands keeps your plating fast under pressure, and Quick Fix immediately tops off your health bar whenever you plate up or finish an attacker.
- The Stealth Counter-Meta Setup (Incognito + Adaptive + Survivor): Designed specifically to counter lobbies stacked with Hunter users and tactical spam. Incognito cuts down enemy wall-outlines and blocks direct live pings on your Operator, Adaptive gives you extra escape speed the moment your armor cracks, and Survivor shrugs off stuns, flashes, and explosive damage inside tight buildings.
How to Get Elite Perks (4th Slot) and Which One to Pick First
The biggest tactical shake-up in Season 1 is the arrival of Elite Perks. Unlike standard Perks, Elite Perks cannot be selected in your pre-match Create-a-Class menu: instead, they occupy a bonus fourth Perk slot acquired dynamically during a match. You can only equip one Elite Perk at a time by purchasing it at a Buy Station or earning it as a reward from completing Supply Run Contracts.
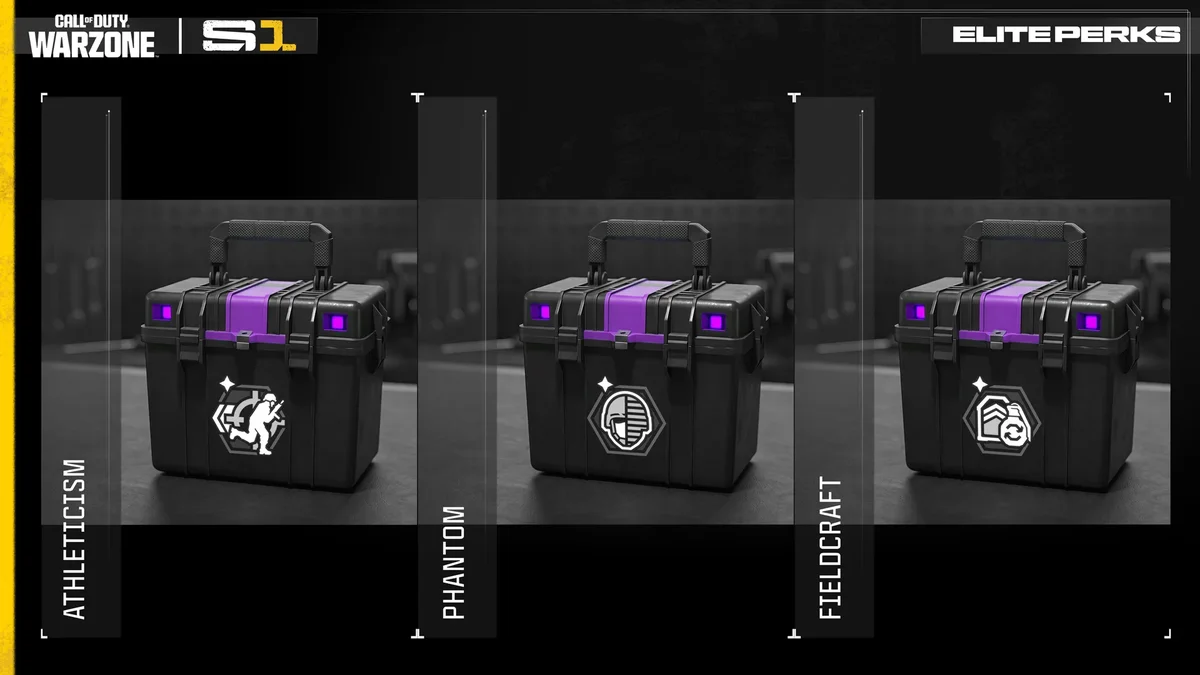
- Phantom (#1 Priority for Late-Game Circles): Effectively replacing the traditional Ghost Perk from standard loadout slots, Phantom makes you completely undetectable by enemy recon Killstreaks (standard UAVs), recon equipment, and tracking Perks (only an Advanced UAV can still pinpoint your last known position).
- Athleticism (#1 Priority for Aggressive Fraggers): Dramatically boosts your agility while strafing, crouching, and aiming down sights (ADS), while heavily reducing ADS accuracy penalties when jumping or sliding into rooms.
- Fieldcraft (Sustained Resource Economy): Automatically regenerates your armor plates as well as your Lethal and Tactical equipment over time, keeping your inventory stocked when supply crates dry up in final zones.
The Strategist's Take
Making Tactical Sprint baseline for every Operator while moving UAV stealth into the in-match Phantom Elite Perk is the healthiest balance decision Raven Software and Infinity Ward have made in years. Entire squads can no longer sit in buildings with free radar immunity five minutes into a match: if you want stealth in the final circles, you now have to earn it by rotating for Supply Run Contracts or spending hard-earned cash at a Buy Station.
After grinding matches across Hajin and Zodiac, the Hunter + Deft Hands + Tempered trio feels mandatory for high-tempo play. Hitting full armor in just two plates while getting a burst of movement speed from Deft Hands lets you reset and win outnumbered 1v2 fights that would have been impossible before. Grab Athleticism from a Buy Station mid-game if you want buttery-smooth slide-ADS gunfights, and swap to Phantom as soon as the fifth circle starts closing.

SEO consultant for over 20 years and digital entrepreneur, Charles "Grimtag" is the founder of Pro-Gamer.gg, Retrocharting.com, and Gamescharting.com. A competitive gamer, streamer, and retro game collector, he has worked in the video game industry for over 15 years, notably as a consultant for leading game price comparison platforms. Passionate about real-time performance data and gaming technology, he analyzes competitive esports, gaming hardware benchmarks, and creator workflows on Pro-Gamer.gg with an authentic player perspective.