The Legend of Zelda: Ocarina of Time (Switch 2): Complete Biggoron's Sword Trade Quest Walkthrough and Timer Tips
Forged at the very summit of Death Mountain, Biggoron's Sword remains the single most devastating weapon in The Legend of Zelda: Ocarina of Time, whether you are playing the original classic or the new Nintendo Switch 2 remake. Unlike the Giant's Knife sold for 200 Rupees by Medigoron in Goron City (which shatters after just eight swings), this two-handed greatsword is completely unbreakable and deals double the damage of the Master Sword. Here is the complete step-by-step walkthrough for Adult Link's trading sequence, along with the essential routing tips to beat all three timed deliveries on your first attempt.
3 Essential Prerequisites Before Starting the Timed Deliveries
Although you can kick off the trading chain the moment Link pulls the Master Sword and steps out of the Temple of Time as an adult, starting unprepared will wall you off halfway through. Before running the errands, make sure you have checked off these three setup steps, which fit naturally into your full 100% Ocarina of Time playthrough:
- Unlock Epona at Lon Lon Ranch: Your mare is mandatory to leap across the broken bridge in Gerudo Valley (if you do not yet have the Longshot) and makes crossing Hyrule Field and the Lake Hylia fences effortless during the timed runs.
- Unfreeze King Zora in Zora's Domain: Head into the Ice Cavern via Zora's Fountain, bottle some Blue Fire, and pour it over the red ice trapping King Zora. You will also pick up the Zora Tunic right before tackling the reworked Water Temple on Switch 2.
- Plant a Magic Bean at Death Mountain Crater (Time-Saver Tip): Planting a Magic Bean as Child Link near the Dodongo's Cavern entrance or inside Death Mountain Crater gives Adult Link a floating leaf platform that bypasses the falling volcanic boulders on the final climb to Biggoron.
Golden Rule for Timed Steps: Never play an Ocarina warp song (Minuet of Forest, Bolero of Fire, Serenade of Water) while a countdown timer is ticking on screen. Warping causes the perishable item to spoil immediately upon arrival, forcing you to backtrack and fetch a fresh one.
Complete 12-Step Biggoron's Sword Trade Sequence Table
| Step | Item Received | NPC and Location | Timer / Requirement |
|---|---|---|---|
| 1 | Pocket Egg | Cucco Lady (Kakariko Village) | Play the Sun's Song to hatch it at dawn |
| 2 | Pocket Cucco | Hatches from Pocket Egg | Wake up Talon inside the house by the stairs |
| 3 | Cojiro (Blue Cucco) | Cucco Lady (Kakariko Village) | No timer (wake Grog in the Lost Woods) |
| 4 | Odd Mushroom | Grog (Lost Woods, left from entrance) | 3-minute timer to Granny's Potion Shop (no warping) |
| 5 | Odd Potion / Odd Poultice | Old Hag (Back of Kakariko Potion Shop) | No timer (warping allowed back to Lost Woods) |
| 6 | Poacher's Saw | Fado the Kokiri Girl (Lost Woods stump) | No timer |
| 7 | Broken Goron's Sword | Mutoh, Boss Carpenter (Gerudo Valley) | Jump broken bridge with Epona or use Longshot |
| 8 | Prescription | Biggoron (Death Mountain Summit) | No timer |
| 9 | Eyeball Frog | Unfrozen King Zora (Zora's Domain) | 3-minute timer to Lakeside Laboratory |
| 10 | World's Finest Eye Drops | Lake Scientist (Lake Hylia) | 4-minute timer to Death Mountain Summit |
| 11 | Claim Check | Biggoron (Death Mountain Summit) | Wait 3 in-game days (play Sun's Song 6 times) |
| 12 | Biggoron's Sword | Biggoron (Death Mountain Summit) | Permanent two-handed sword reward |
Part 1: From Kakariko Village to the Lost Woods
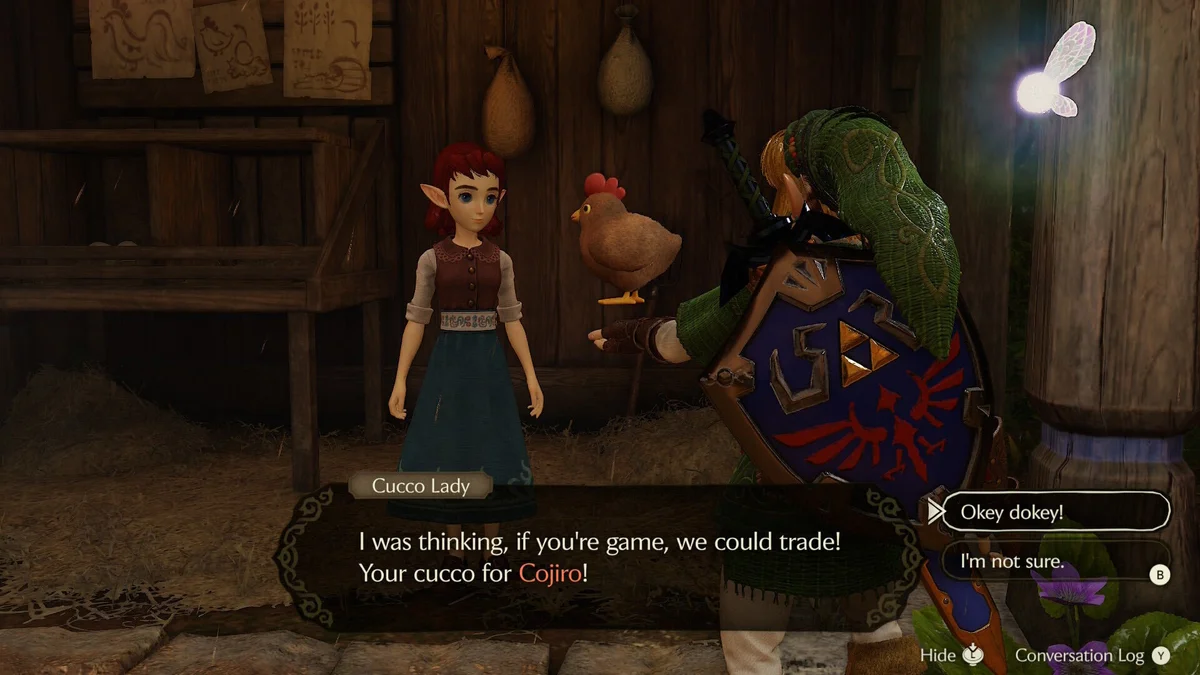
Begin your journey in Kakariko Village by speaking to the Cucco Lady standing near the pen at the graveyard entrance. She hands you the Pocket Egg. Play the Sun's Song twice on your Ocarina (or wait until the next morning) so it hatches into the Pocket Cucco. Step inside the house at the bottom of the main village staircase and use the bird right next to Talon sleeping on the bed; he will bolt awake and head back to Lon Lon Ranch.
Show the Pocket Cucco back to the Cucco Lady. Thrilled to see her bird happy, she entrusts you with Cojiro, a rare blue Cucco that belonged to her brother Grog. Head to the Lost Woods (you can warp to the Sacred Forest Meadow with the Minuet of Forest and backtrack to the entrance). From the very first room entering from Kokiri Forest, take the left path: Grog is dozing against a tree stump. Pull out Cojiro in front of him to wake him up.
Grog hands over the Odd Mushroom, immediately triggering the first 3-minute countdown. Do not play any warp songs! Exit the Lost Woods, sprint through Kokiri Forest out to Hyrule Field, summon Epona, and gallop straight to Kakariko Village. Enter the main Potion Shop, walk through the left door behind the counter into the backyard, and climb the steps into Granny's Potion Shop. Hand the mushroom to the old hag before time runs out to receive the Odd Potion (also called the Odd Poultice). Because this item has no timer, you can safely warp back to the Lost Woods. Where Grog used to sit, the Kokiri girl Fado informs you he has turned into a Stalfos and trades you the Poacher's Saw for the medicine.
Part 2: From Gerudo Valley to Death Mountain Summit
Ride Epona west across Hyrule Field into Gerudo Valley and gallop at top speed to leap across the shattered wooden bridge. Outside the carpenters' tent, hand the Poacher's Saw to Mutoh, the Boss Carpenter. In return, he gives you the Broken Goron's Sword. Climb to the top of Death Mountain Trail (just to the left of the Death Mountain Crater entrance and the Great Fairy's Fountain) to meet the colossal Biggoron. Recent volcanic ash has left his eyes too irritated to smith, so he gives you a Prescription to take to King Zora.
Travel to Zora's Domain (warping with the Serenade of Water is fine here since the Prescription is not timed). Show the Prescription to the unfrozen King Zora, who hands you the Eyeball Frog and starts the second 3-minute timer. Exit Zora's Domain down Zora's River into Hyrule Field, call Epona, and ride south to Lake Hylia, jumping cleanly over the wooden fences. Enter the Lakeside Laboratory and give the frog to the Lake Scientist before the clock hits zero.
The scientist brews the World's Finest Eye Drops, setting off the final 4-minute countdown. Step outside, mount Epona, and gallop northeast across Hyrule Field into Kakariko Village. Sprint up Death Mountain Trail, dodge the Tektites and falling volcanic rocks (or ride your Magic Bean leaf platform up from the crater entrance), and hand the Eye Drops to Biggoron at the summit. Relieved, the giant smith hands you the Claim Check. Simply play the Sun's Song six times in a row to pass three full in-game days, show the Claim Check back to Biggoron, and claim the unbreakable Biggoron's Sword.
My Perspective
Twenty-eight years after my palms first sweated through that Lake Hylia to Death Mountain sprint on the Nintendo 64 controller, racing the four-minute clock on Nintendo Switch 2 still delivers the exact same rush. There is something deeply satisfying about routing this quest the moment Link wakes up as an adult and walking into the Forest and Fire Temples swinging a greatsword twice as strong as the Master Sword. Once you get used to the massive reach and raw damage of Biggoron's Sword against minibosses like Dark Link, the Master Sword honestly stays sheathed until the final blow against Ganon.

Based on the outskirts of New York City, Chaya 'Chayane' spent five years studying software engineering in Montreal before returning to her home state. A Full-Stack developer and Deep Learning AI architecture researcher, she explores neural networks and algorithmic optimization while engineering data pipelines for Retrocharting and Gamescharting alongside Grimtag. A gamer for over 20 years and an avid collector of Nintendo history and The Legend of Zelda, she explored World of Warcraft's Azeroth before bringing her deep technical background to video game analysis.