How to Get Your Car Out of Impound in GTA 6: Scooter Bros Fee, Stealth Break-In, and Hamlet Lot Walkthrough
Losing your favorite customized ride in the middle of a getaway is one of the most common setbacks in Grand Theft Auto VI. Whenever Jason or Lucia gets arrested by law enforcement (Busted), goes down during an active police pursuit (Wasted), or abandons a high-profile getaway car inside a search zone to clear Vehicle Heat, Leonida police will tow the vehicle straight to the nearest Police Impound Lot.
Fortunately, an owned and registered personal vehicle is never gone for good. Whether you prefer paying a remote fine on your smartphone in ten seconds or scaling a barbed-wire fence at night to steal your own ride back for free, here is the complete breakdown of how to get a car out of impound in GTA 6, including how to protect the weapons and contraband stored inside your trunk.
Quick Summary: Every Way to Get an Impounded Car Back in GTA 6
| Retrieval Method | Availability | In-Game Cost | Pros, Cons & Trunk Inventory Impact |
|---|---|---|---|
| Call Joey (Phone Contact) | Chapter 1 (Leonida Keys) | Small towing fee | Allows early vehicle recovery and repairs before smartphone apps unlock in Chapter 2. |
| Scooter Bros App (Standard Retrieve) | Chapter 2 onwards (after Moses' garage mission) | $600 via BuckMe ($100 base rate + $500 retrieval & distance fee) | Instant roadside delivery with zero Wanted stars, but risks losing illicit stash bags stored inside the trunk. |
| Scooter Bros Premium Subscription | Chapter 2 onwards | $12,500 (one-time upgrade fee) | Grants 1 free impound retrieval per in-game day, though it consumes all remaining daily free deliveries (3 per day, or 5 with GTA+). |
| Stealth Break-In (Police Impound Lot) | Chapters 1 to 5 (Free Roam) | Free ($0) | 100% preserves all trunk stash bags and contraband, but triggers an alarm and a police response when breaking out. |
How to Locate an Impounded Car on the Map and Protect Your Trunk Loot
First, keep in mind that police impound recovery only applies to registered Personal Vehicles (Jason and Lucia's default vehicles plus any ride you have officially claimed). If you abandon a random car stolen off the street without taking the time to register your new personal vehicle at Moses' garage or a Pay 'n' Spray, it will despawn permanently once confiscated.
When a registered ride is impounded, open your Leonida map, pull up the map index, and check the Personal tab. The specific police lot holding your vehicle will be marked with a cyan car-and-shield icon. While your vehicle sits behind that locked chain-link fence, everything stored inside its trunk is impounded along with it: your long-arm weapons (assault rifles, shotguns, sniper rifles), spare outfits, and valuable robbery contraband (drugs, jewelry, and marked bills). Retrieving your vehicle quickly is essential before starting your next heist or side job.
Method 1 (The Legal Way): Pay the Fine Remotely via the Scooter Bros App
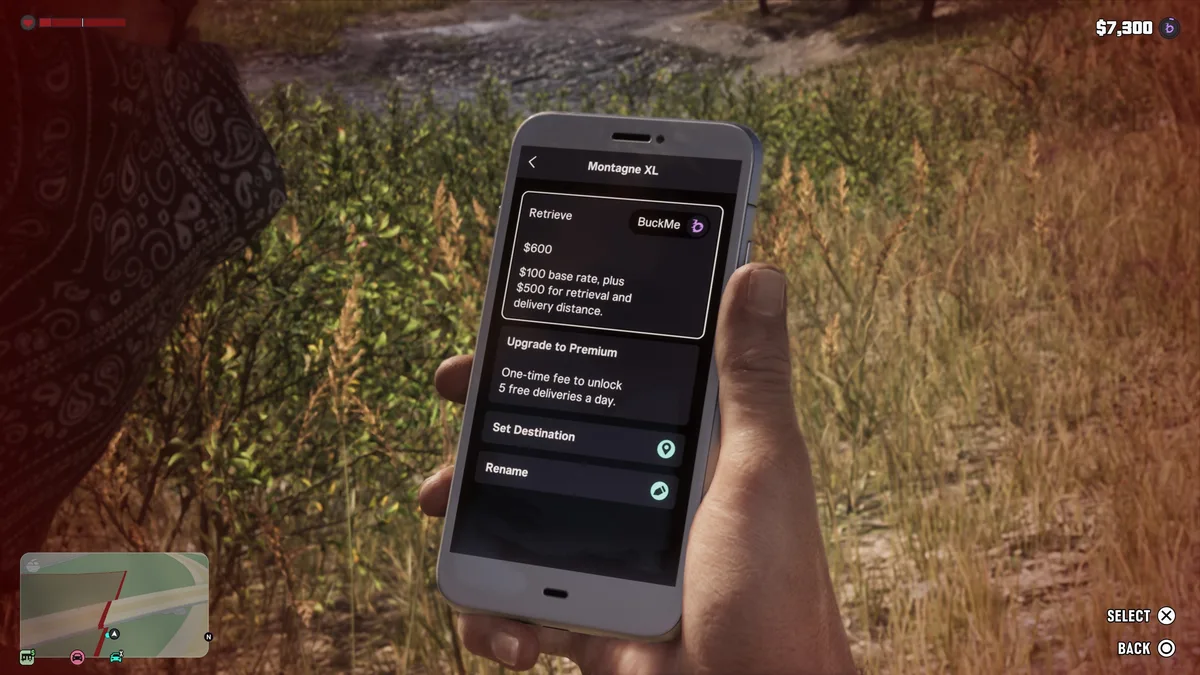
During Chapter 1 in the Leonida Keys, your only remote option is opening your phone contacts and calling Joey to recover your ride. Early in Chapter 2 in Port Gellhorn, however, registering your first car with Moses unlocks the Scooter Bros app on your smartphone. If you want a clean, hands-off delivery without dealing with police patrols, follow these steps:
- Pull up your in-game phone and launch the Scooter Bros application.
- Select your impounded ride from your list of registered personal vehicles (marked with a small police badge icon). You can also tap Set Destination if you just want a GPS waypoint to the lot.
- Select the Retrieve option at the top of the screen, paid directly through your BuckMe balance. A standard impound recovery costs $600 in total, listed on-screen as a $100 base rate, plus $500 for retrieval and delivery distance.
- If you purchase the one-time Upgrade to Premium tier for $12,500, you unlock up to 5 free vehicle deliveries a day (3 standard daily deliveries, or 5 for GTA+ subscribers) plus one free impound retrieval per day. Note that the app will warn you before confirming: claiming a free impound retrieval uses up all of your remaining free deliveries for that in-game day.
Crucial Trunk Warning: While your registered long-arm guns remain tied to your weapon locker loadout, using remote app delivery on an impounded vehicle can cause illicit stash bags left in the trunk to be confiscated. If you stashed unlaundered loot in the back, do not use remote retrieval.

Method 2 (The Illegal Way): Break Into the Police Impound Lot for Free
If you refuse to hand over $600 to Leonida law enforcement or need to rescue contraband bags sitting in your trunk, you can travel to the impound icon on your map and steal your car back the classic Grand Theft Auto way. Here is how to pull off a clean extraction:
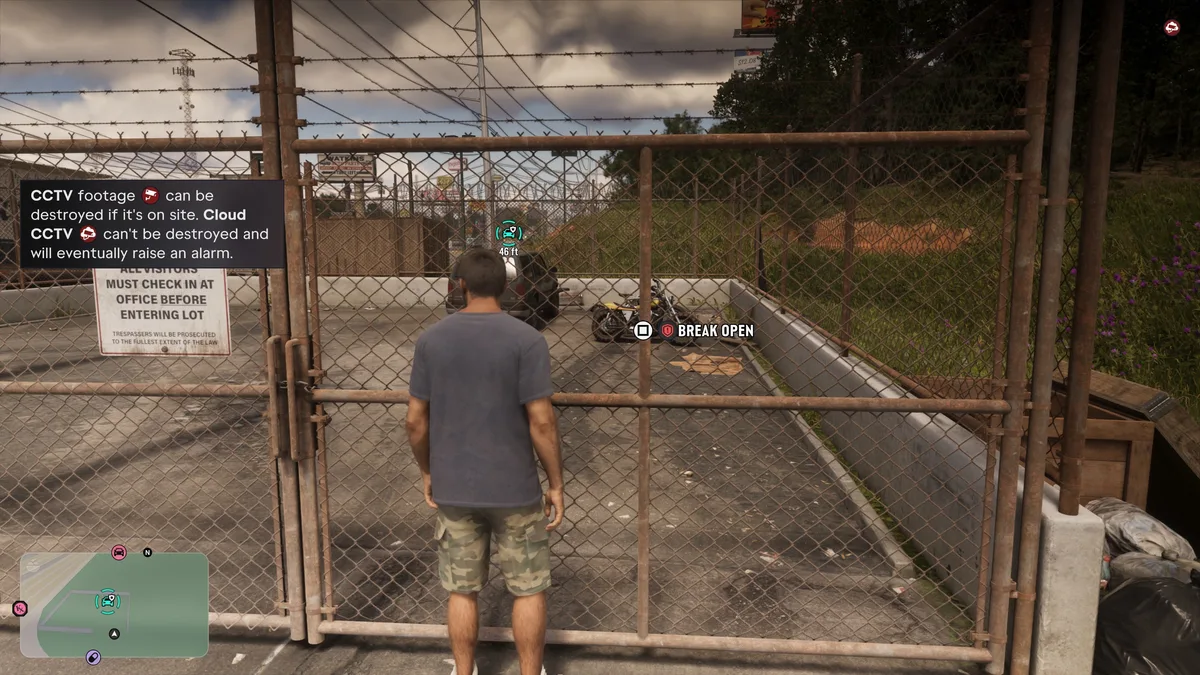
- Skip the front office and climb the perimeter: Never walk through the main visitor check-in office. Circle the outer fence to find a lower wall section to vault over (
Crosson PS5 /Aon Xbox), or use an adjacent electric scissor lift to climb onto the impound building's roof and drop quietly into the yard. - Watch out for Cloud CCTV cameras: Crouch immediately (
Circle/B) to stay out of guard sightlines and watch the camera alert icon in the top-right corner of your HUD. In GTA 6, standard CCTV footage (red camera icon) can be destroyed if its recorder is on site. However, Cloud CCTV cameras (marked with a red cloud-and-camera icon) upload footage remotely: they cannot be destroyed and will eventually raise an alarm if you linger in their view. - Force the gate and abuse the delayed police response: Approach the padlocked chain-link gate and hold
Square(PS5) orX(Xbox) on the Break Open prompt, hit the manual gate switch inside the yard, or simply jump into your car and smash straight through the fence. - Fast getaway: Breaking your car out immediately notifies police dispatch that a vehicle was stolen from the impound lot. Because officers are not waiting outside the gate, you get a brief delayed response window before patrol cruisers arrive. Floor the accelerator, cut through side alleys to exit the flashing search zone before cruisers establish line of sight, and your car is yours again for $0. While exploring Port Gellhorn between police chases, you can also check out our guide on where to find all 3 Transgressor wreck locations for Wyman in Port Gellhorn.
Chapter 1 Story Walkthrough: How to Beat the Hamlet Impound Lot in "Unwanted Attention"
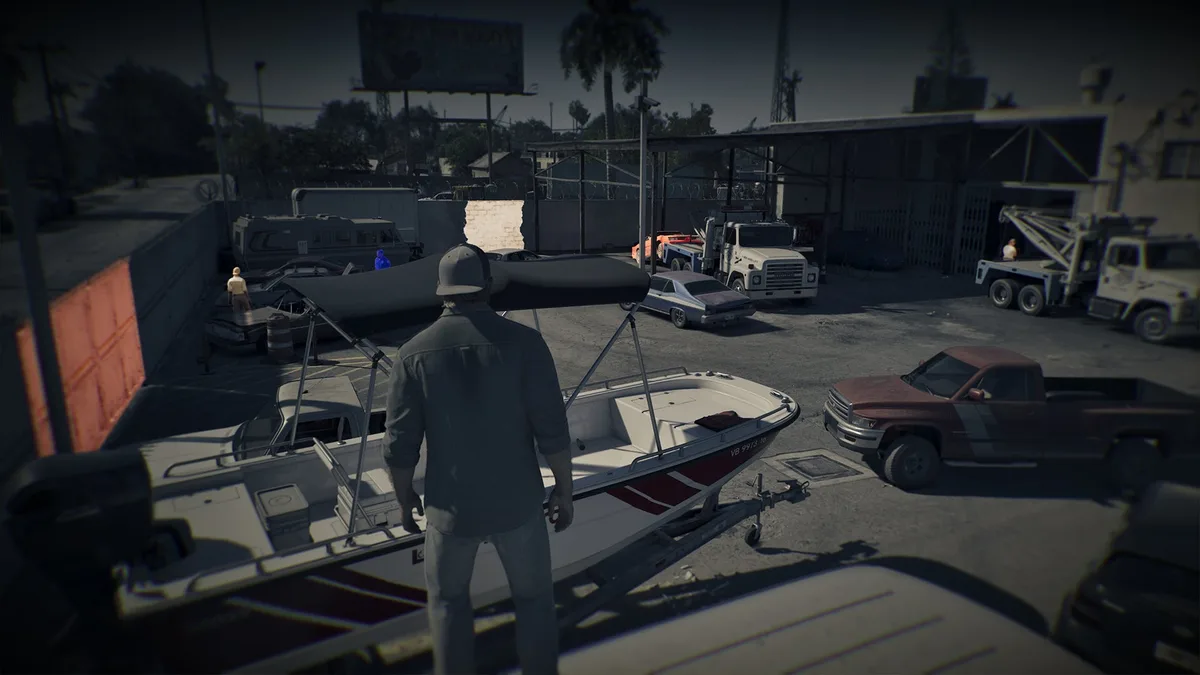
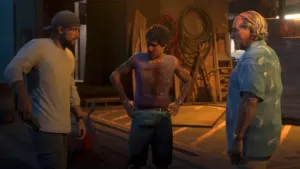
Your first hands-on tutorial with the impound mechanic takes place during the mandatory Chapter 1 mission "Unwanted Attention" given by Cal Hampton at Corsair Keys (north of Key Lento). After driving Cal's Bison 900 truck to the neighboring town of Hamlet, Cal installs the pirate Police Radio Scanner app on Jason's phone and leaves you outside the Hamlet Police Impound to recover a red Imponte Phoenix holding a stash in its trunk.
Follow this exact sequence to get the Phoenix out cleanly and avoid the common progression bug at the end of the mission:
- Head to the left side of the Hamlet impound lot, vault over the lower wall section next to the Police Impound sign, and immediately crouch to avoid lot workers.
- Sneak toward the back of the lot where the red Imponte Phoenix is parked. Because the sports car is hooked to the back of a tow truck, you cannot drive it off yet: climb into the tow truck cab (or approach the hitch mechanism) and press the right thumbstick (
R3) to release the tow cable. - Get inside the red Phoenix and complete the Hotwire mini-game by pushing both the
Left StickandRight Stickinward, then sliding each thumbstick up and down until both bars glow bright hot pink. - Smash out through either side fence (avoid running over workers or officers so you do not escalate your Wanted rating), follow the black directional marker in the center of your red compass bar to exit the search circle, and drive down the dirt road to the Hamlet Pay 'n' Spray at Peyton's Scrapyard.
- Repair the car for free and respray it any color except red, then drive 0.39 miles east to Brian's Garage behind the McClane Ventilation Specialists building.
- Don't get stuck at Brian's Garage: Before walking through the blue office doors to grab your cash reward, open the wall-mounted first aid cabinet to the left of the blue doors for free Adrenaline and Zombix. Finally, walk right next door into the Big Shots Ammu-Nation, turn right to the clothing rack, and buy and equip a new outfit. Until Jason changes his clothes to clear his personal recognition heat, the mission will not complete.
My Take
After dozens of hours testing vehicle recovery across Port Gellhorn and Vice City, my rule of thumb for choosing between the $600 Scooter Bros fee and a manual impound break-in comes down to one thing: what is sitting in the trunk. If my car was impounded with only my standard long-arm weapons inside, paying $600 via BuckMe (or burning my last daily delivery credit with Scooter Bros Premium right before the in-game day resets) saves ten minutes of unnecessary backtracking. The moment I have unlaundered stash bags or robbery loot in the trunk, however, I always break into the impound lot myself: by forcing the padlock with Square / X and flooring it during the police dispatch delay, you can clear the search radius in under twenty seconds before a single patrol cruiser even reaches the block.

Grand Theft Auto 6 (GTA 6)
Explore official trailers, technical specs and all latest coverage for Grand Theft Auto 6 (GTA 6).

SEO consultant for over 20 years and digital entrepreneur, Charles "Grimtag" is the founder of Pro-Gamer.gg, Retrocharting.com, and Gamescharting.com. A competitive gamer, streamer, and retro game collector, he has worked in the video game industry for over 15 years, notably as a consultant for leading game price comparison platforms. Passionate about real-time performance data and gaming technology, he analyzes competitive esports, gaming hardware benchmarks, and creator workflows on Pro-Gamer.gg with an authentic player perspective.